This quick how-to is designed for someone who needs to work on your code, but where it is not practical to train them on all the benefits of git/source control. I have some workflow thoughts for the git administrator at the end of the article. The tutorial is aimed at a Windows user but should be reasonably portable. Any thoughts, comments, criticisms, or ideas for improvements please let me know and I’ll edit the article!
Download and install software
Download the git client.
Run the installer and answer the questions as follows:
- Install location: wherever you like!
- Components to install: if you don’t want to use git much then feel free to remove the Windows Explorer integration, don’t bother with desktop and quick launch icons, etc. I would suggest you allow .git* to be associated with your default editor though.
- Adjusting your PATH environment: select “Use git from git bash only”.
- Configuring the line end conversions: Checkout Windows-style, commit Unix-style.
Get a copy of the project
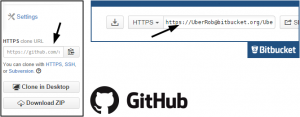
GitHub and BitBucket clone URL locations
For this step, the git administrator should give you a URL for the git repository and a branch name, use these values in the commands below. If you’ve been given access to a BitBucket or github repository, the URL for the repository can be found on the site and depends on your username.
- Open up Git GUI.
- Clone Existing Repository… Source location is the git repository URL you’ve been given and the target directory is wherever you’d like it to be on your computer. If you’re given a choice, select to download a Full Copy as well.
- Hit the Clone button and wait (you may need to enter your password)
Git GUI open repository

Git GUI create tracking branch
You are now ready to work!
You have work ready to send?
Git GUI Commit & Push
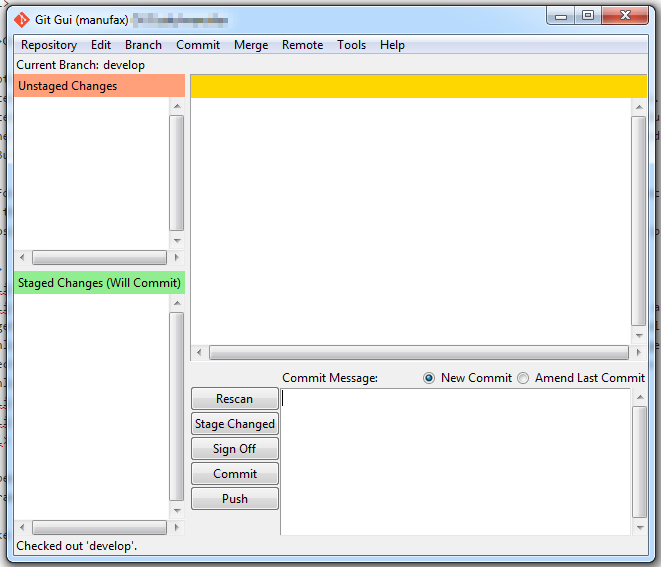
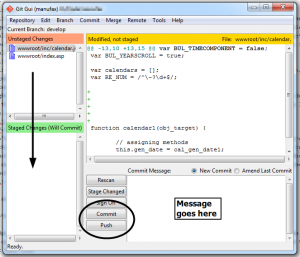
Open up Git GUI and it will list the repositories you have created – click on the correct one or use the open command to bring up the GUI window we’ve seen before. The changed files will be in the top left hand section. (Hint: if you’ve not closed the window from before, click the rescan button to show changed files).
Move these changes into the bottom left pane by selecting the files, the going to Commit -> Stage to Commit. Enter a message in the bottom right box and then click Commit. Then click Push.
You have sent your changes back to the repository owner (although it’s good form to let them know as well).
You have updated files to receive?
In this model, only either your or the repository owner can make changes at once (git is much more powerful than this, but we’re keeping it simple). If you know changes are coming from the source, wait until they’re ready then follow this update procedure.
Open up Git GUI to the repository and select Remote – Fetch From – origin. This gets the latest code data from the source.
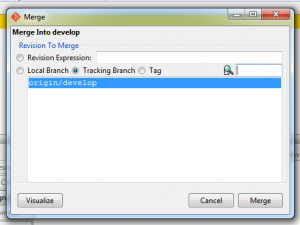
Git local merge window
To update your code you need to go to Merge – Local Merge – you should be able to select origin/<your-branch-name> and then click merge. If you’ve not made any changes – or your changes are in completely different files, then it will merge fine and you’re ready to go again.
Workflow thoughts for the git administrator
To avoid exposing any of the more complicated workings of git, I’ve set the user up with a branch that only they are using. If you need to send them new files, they need to commit, push and then stop editing their files until you have merged new changes back into their branch for them. At that point, ask them to update.